 I ran this tutorial about 6 months ago, but as we have soooo many new readers and this is a very useful technique I am running it again.
People will often say to my wife "you must have beautiful pictures of your girls" (just because I own a camera or two) and her response is always the same "the cobbler's wife has no shoes", so I decided to surprise her by photographing my girls for a canvas pano that they would give her for Mothers Day.
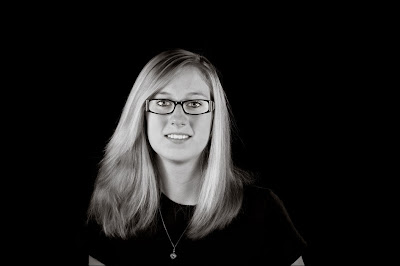
One of the problems I faced (other than the fact when I talk my girls hear "blah, blah, blah") is two of my three girls wear glasses. To make it even harder Emma (pictured above) has glasses with very wide sides (that work great at blocking light) AND she wears them further away from her eyes because she has incredibly long eye lashes.
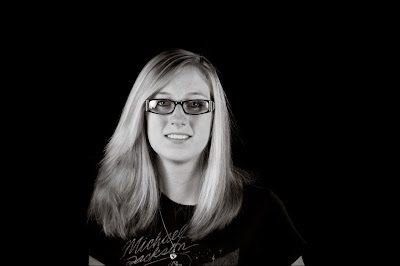 So I took a few shots and was not at all liking the results at all so I decided to try something I had been shown by Jed Taufer, I instructed Emma to try to maintain her position as best she could while reaching up and removing her eye glasses and snapped a couple shots of her with her glasses off (this will work best if you shoot on a tripod).
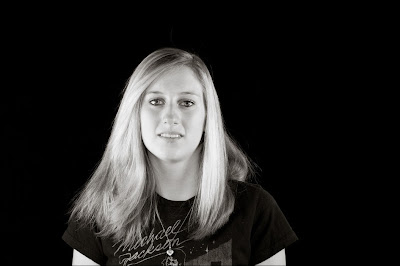 I took all the images into Photoshop and using a lasso tool made a rough selection around her eyes (in the image without glasses).
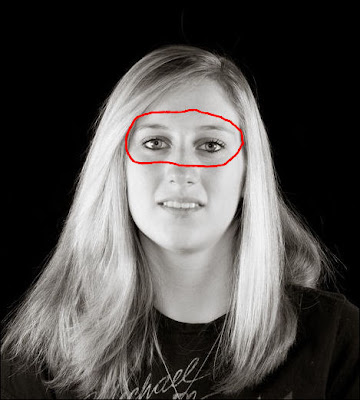 I copied the selection and then pasted it into the image with the glasses. I lowered the opacity of the eyes I brought into the image and this helped me get them into the correct position. Make sure you increase it back to 100% before moving on. With the layer of the imported eyes selected I created a "hide all" (black) layer mask by holding down the "ALT" key and then clicking on the layer mask button.
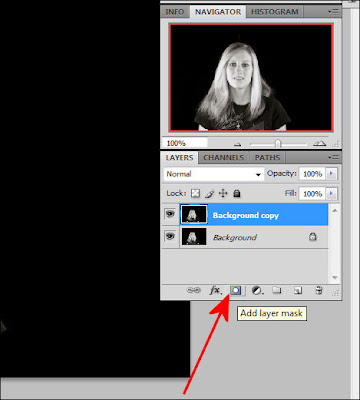 Then using a white brush (with the primary/original layer selected) I carefully erased the lenses in her glasses revealing her eyes that I brought over and "hid" in the layer mask. If you make a mistake while erasing and remove part of the frames simply change the brush to black and paint over the area you meant to keep and it will "re-appear" (just remember the rule "white reveals and black conceals").
Here is her finished image.
 And that was pretty much it.
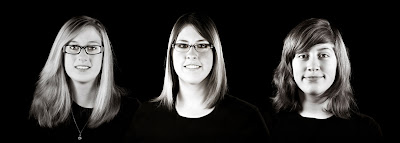
The image below is the finished product, each of the girls were shot individually and them combined in Photoshop, using techniques similar to the "Twilight Poster" shoot.
By doing it this way all three girls were lit exactly the same, I didn't have to worry about who was casting a shadow on who, or listen to the inevitable bickering that comes when three teenage girls standing to close to each other.
;)
And so I would not have to worry about "perspective" when I combined all three girls my camera was on a tripod (and was not moved) and once I shot the first girl her position was marked and each girl that followed stood in exactly the same place.
