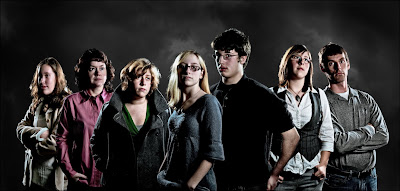
 Last week I posted about Zach Hodges "Twilight" tutorial, well, this is my effort.
Here's how I did it.
First, taking the photograph:
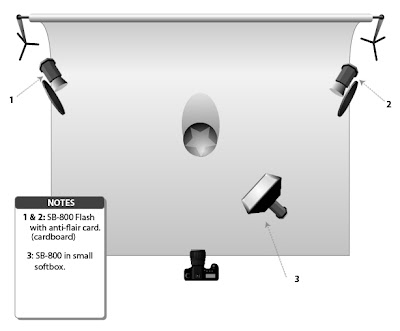
1. I used three flashes (SB-800's) triggered by pocket wizards (more on them later this week)
2. The two rear flashes were "bare bulb" with anti-flare cards and the front flash was in a small soft box (see setup image below)
3. All flashes were set to 1/4 power
4. Each person was shot individually and stood on the same (marked) spot in front of a white background
Second, processing the images:
1. I brought the RAW images into Lightroom and over saturated the images
2. Then I brought them into Photoshop and did two things you would usually try to avoid
3. The eyes were over brightened
4. I then over worked the skin, so that is was very smooth, almost "plastic"
5. Using the magic wand I selected the white background, then "inversed" so that the person was selected
6. Because the background was white, separating the subject from the background was really, really easy
Third, the background:
1. I took a nature shot that had a cloudy, dark, ominous sky
2. The image was cropped, leaving mostly sky (what land was left would be covered by people)
3. The image was burned until it was quite dark (and had the right "look & feel")
Finally, bringing it all together:
1. Each person as brought into (or onto) the background image and remained on their own layer, this made it easy to move them into the right position later
2. Once I had everyone into position I then applied the "Dave Hill" technique to the entire image, though I did leave out the fourth and final step of the process as I wanted the image to more "smooth" than "gritty"
and there you have it...
Should you give this a try I would love to see (and share) your results.


